
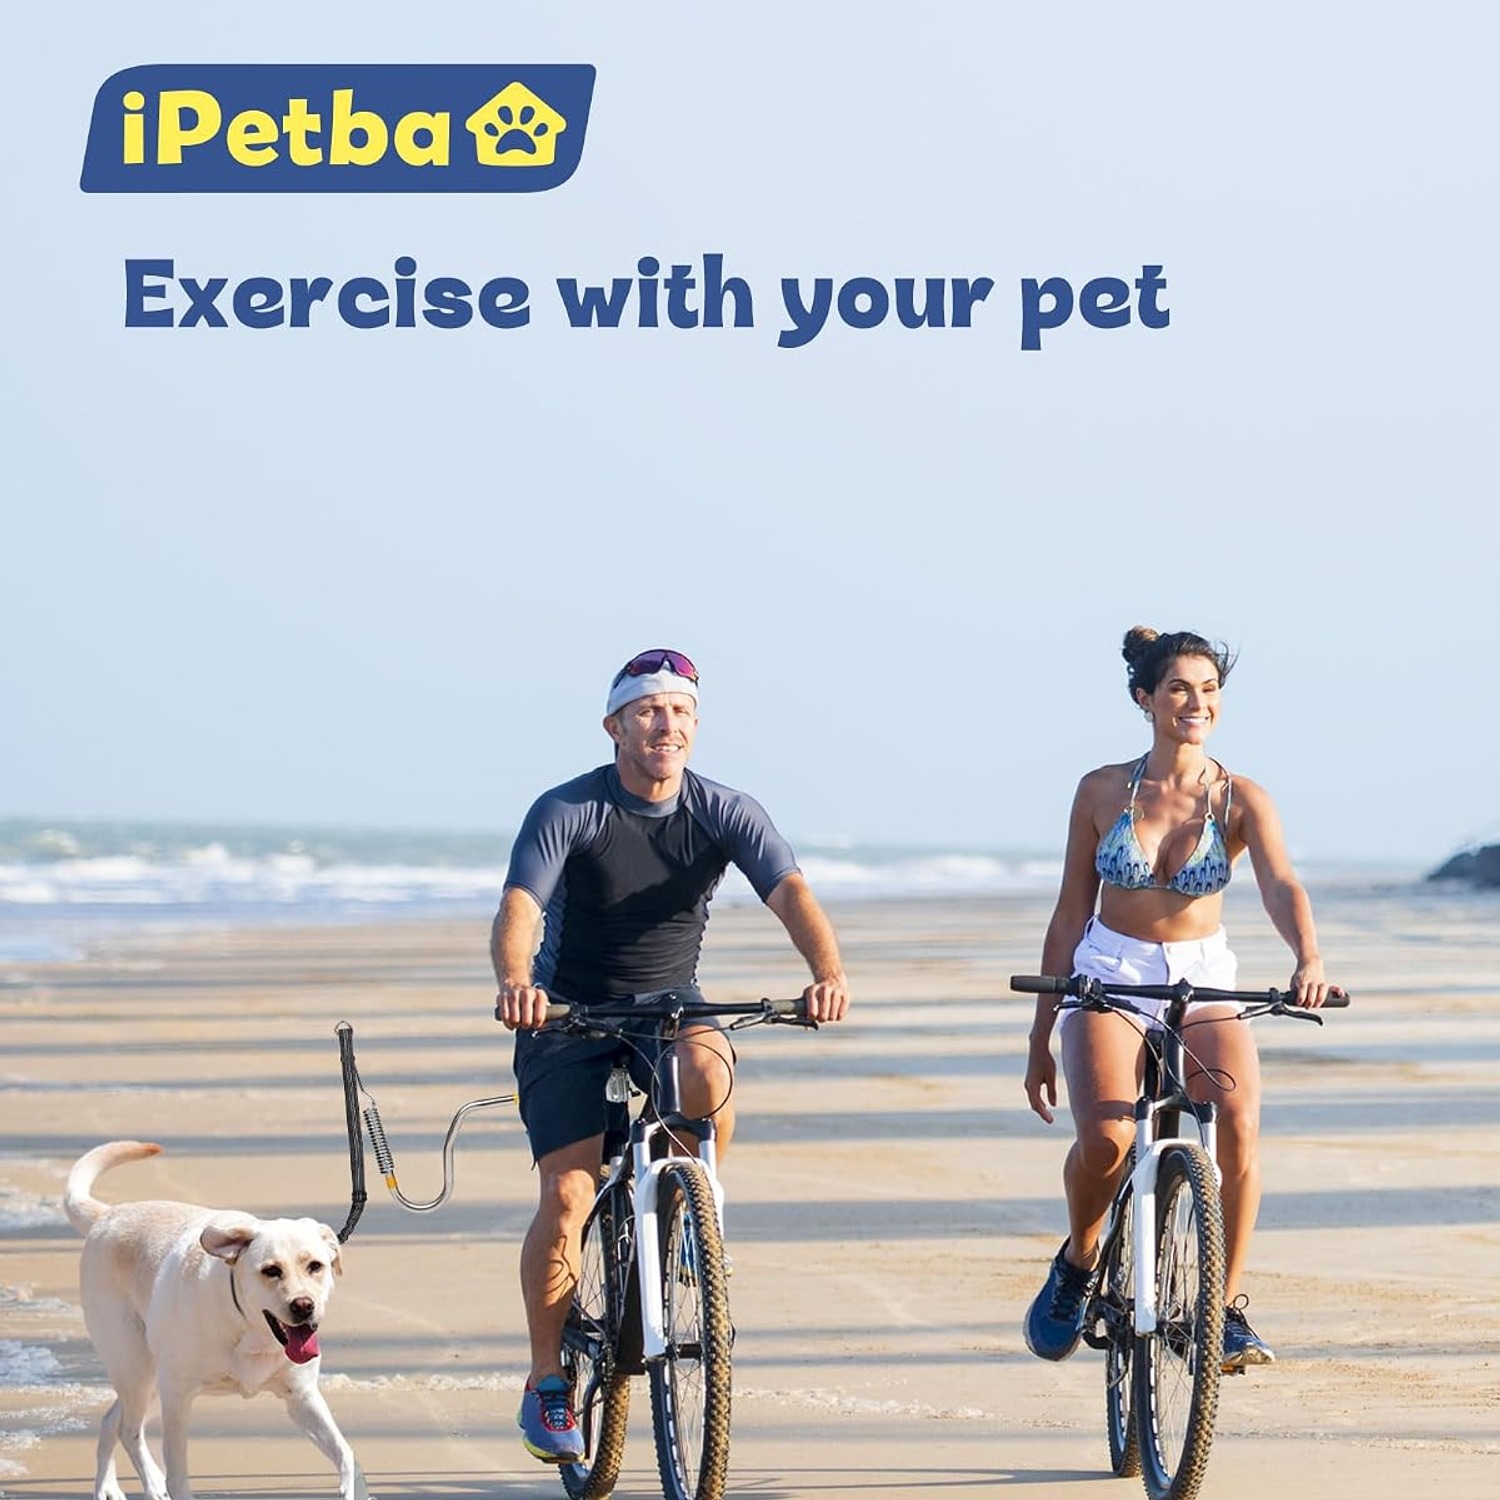
The complete guide
Cycling With Your Dog, A Buyer's Guide To Bike Tow Leashes
The problem with holding the lead
Anyone who has tried cycling with a dog on a normal lead knows the moment. The dog spots something, veers, and the lead pulls one side of your handlebars down. You correct, you wobble, and for a second you are a passenger on your own bike. On a quiet path that is embarrassing. Near a kerb or a car it is dangerous.
The issue is not the dog. It is physics. Handlebars are a steering input, and anything that tugs on them steers the bike. Your arms are also not very good at absorbing a fast pull, because they are already busy holding you up and keeping the front wheel pointed forward.
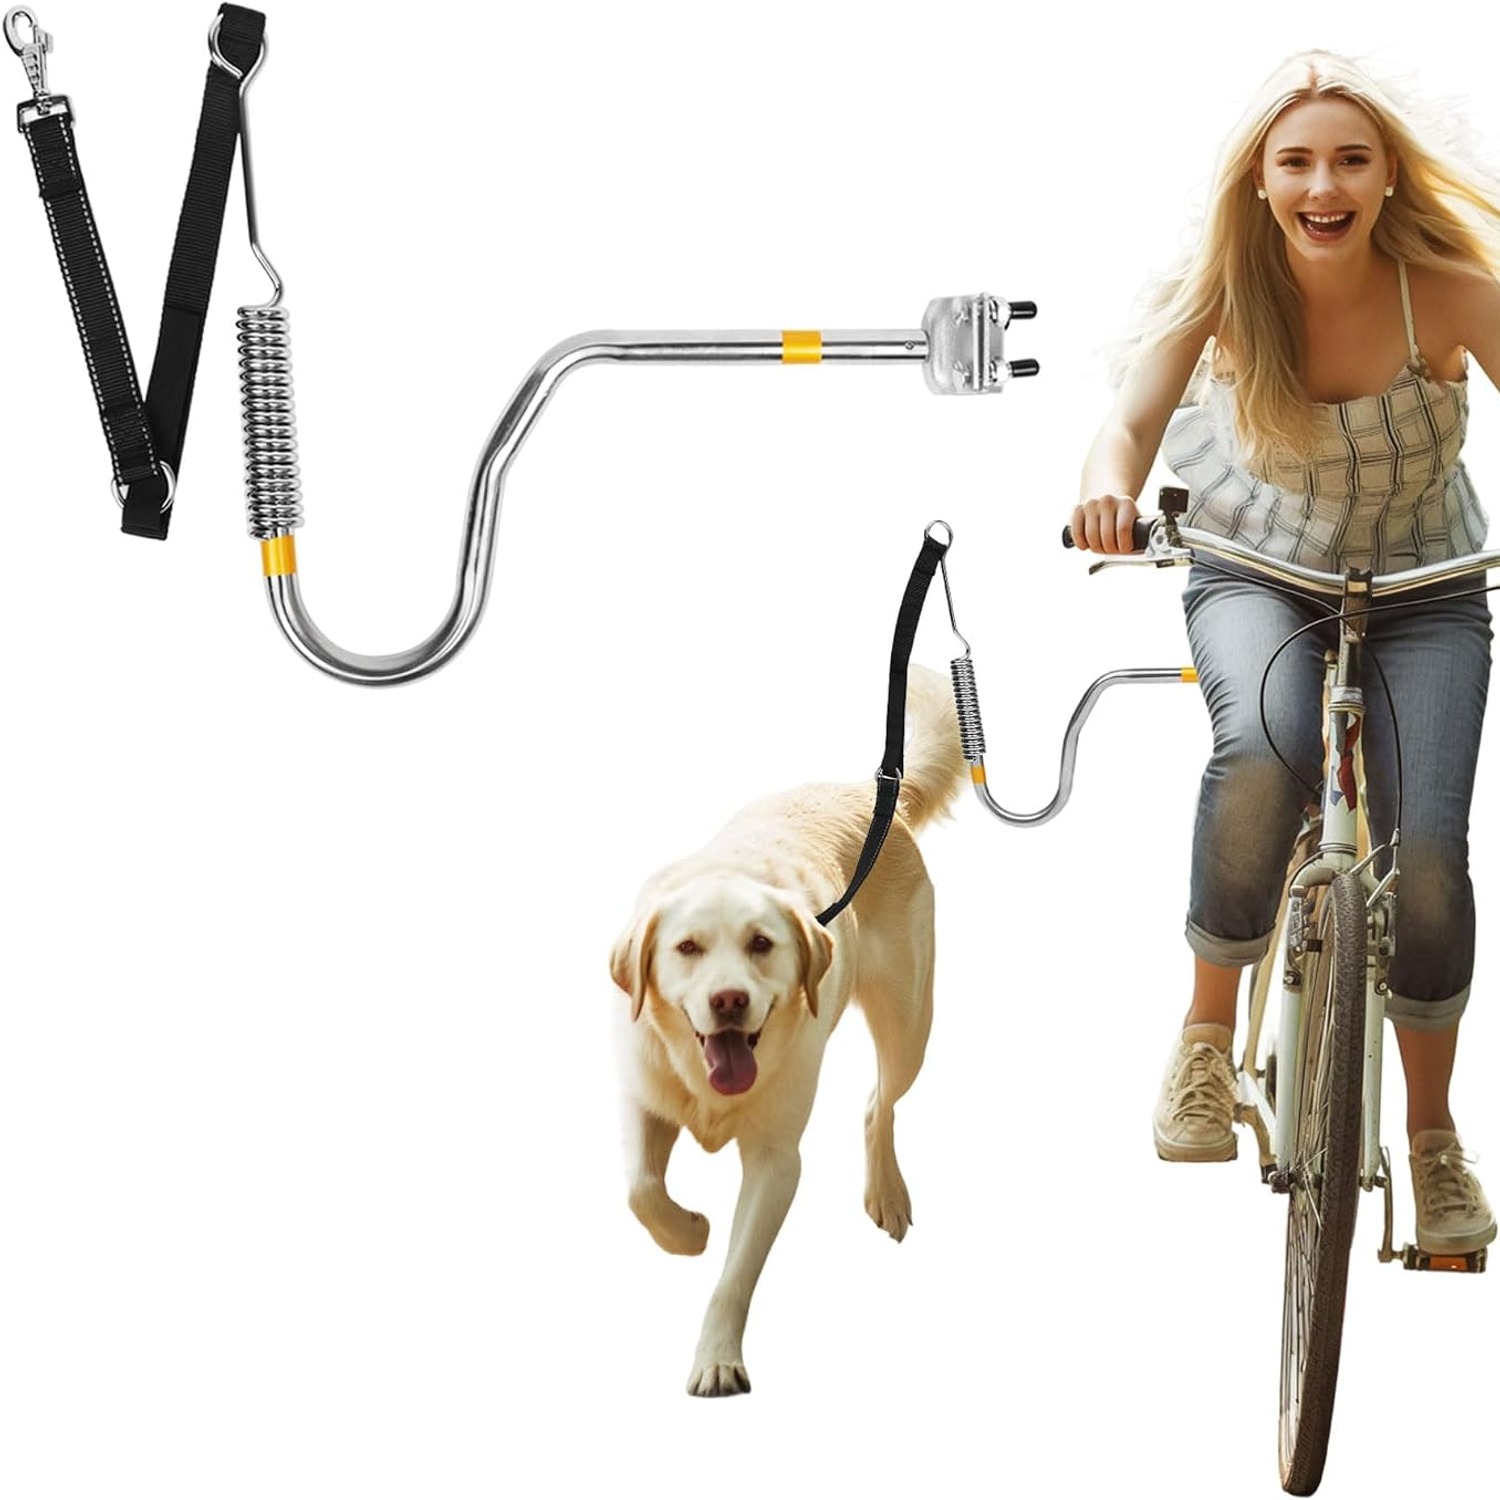
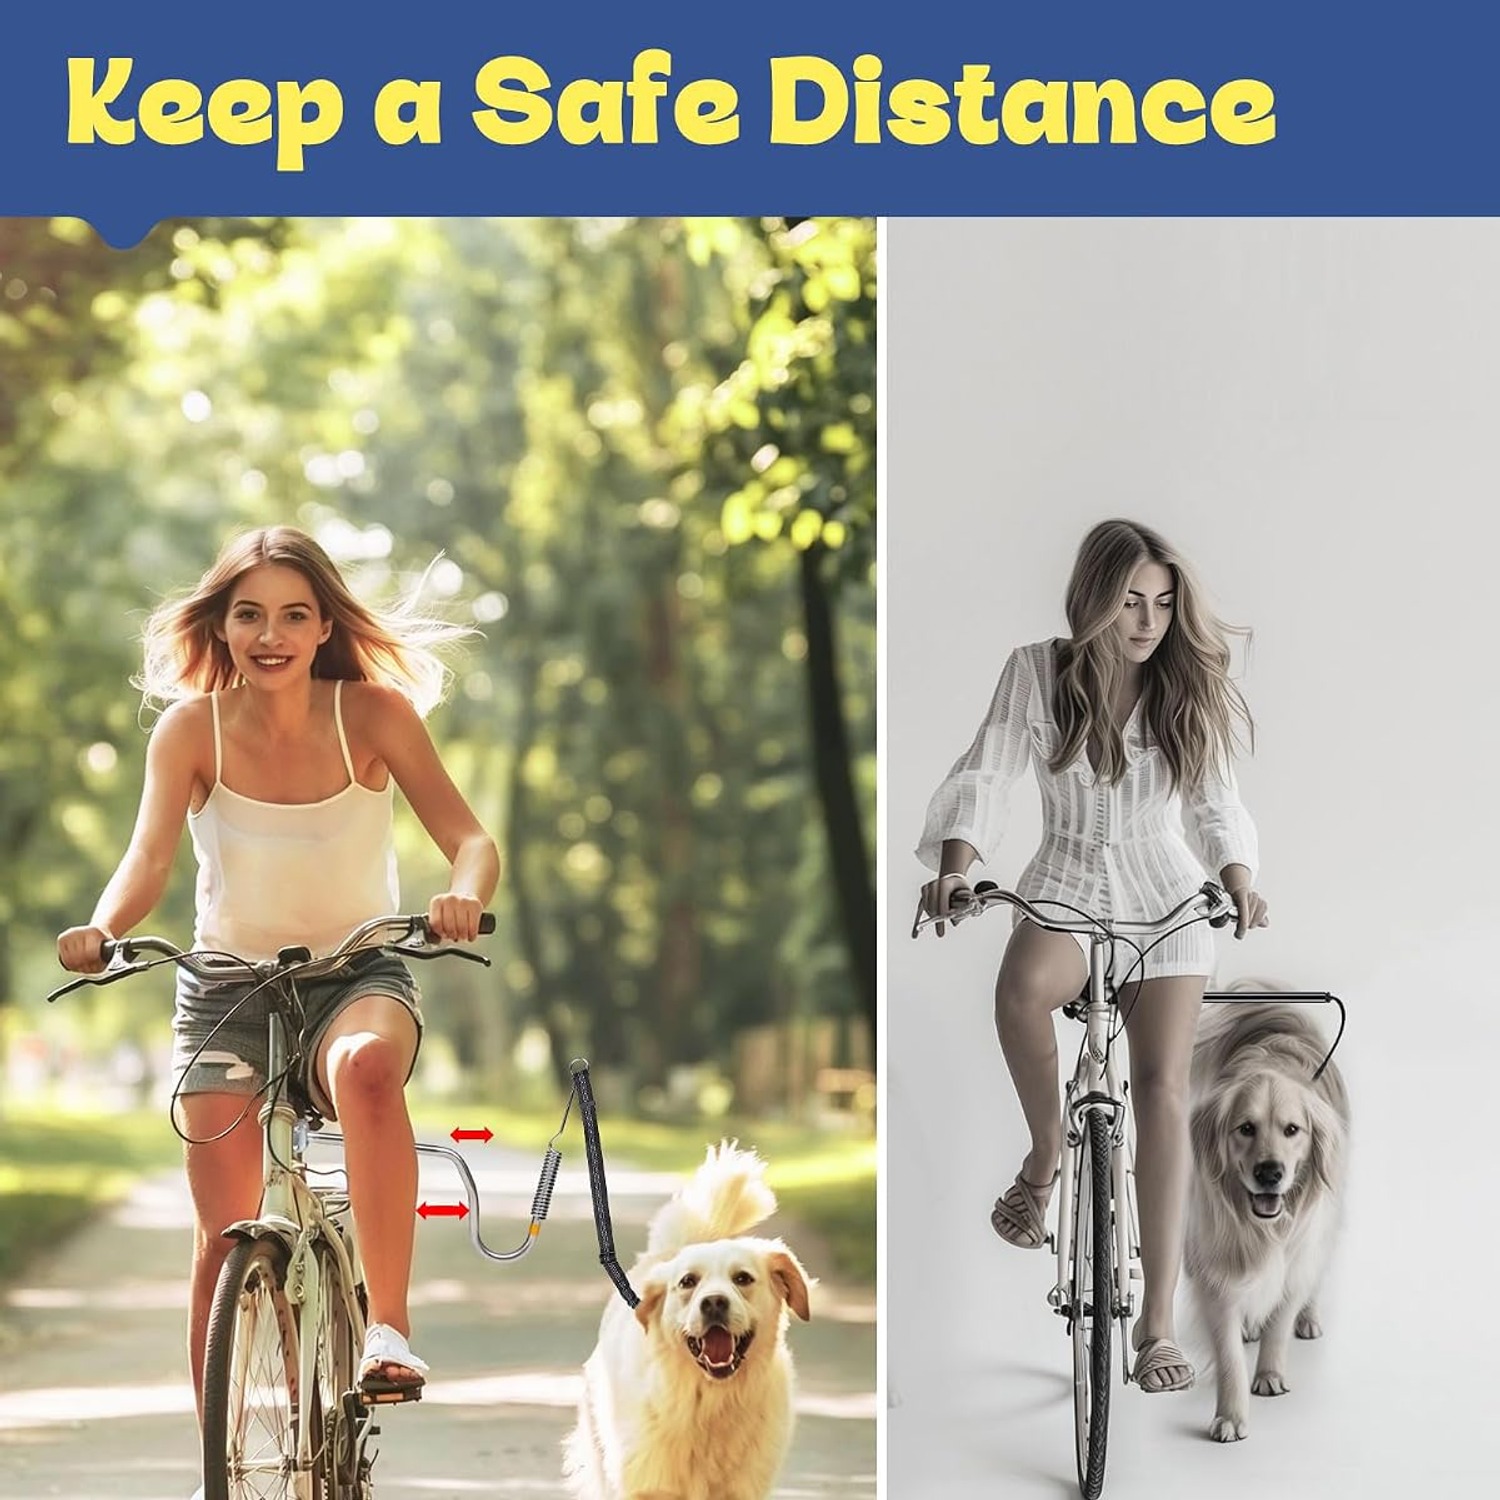
A bike tow dog leash fixes this by moving the attachment point. Instead of the dog pulling on your hands, the dog pulls on the frame, down near the seat post, low and behind the centre of the bike. That is a much better place for a sideways force. The bike has mass and a wheelbase, and it shrugs off pulls that would have had you swerving.
How a seat post leash actually works
There are three parts that matter. The mount, the arm and the lead.
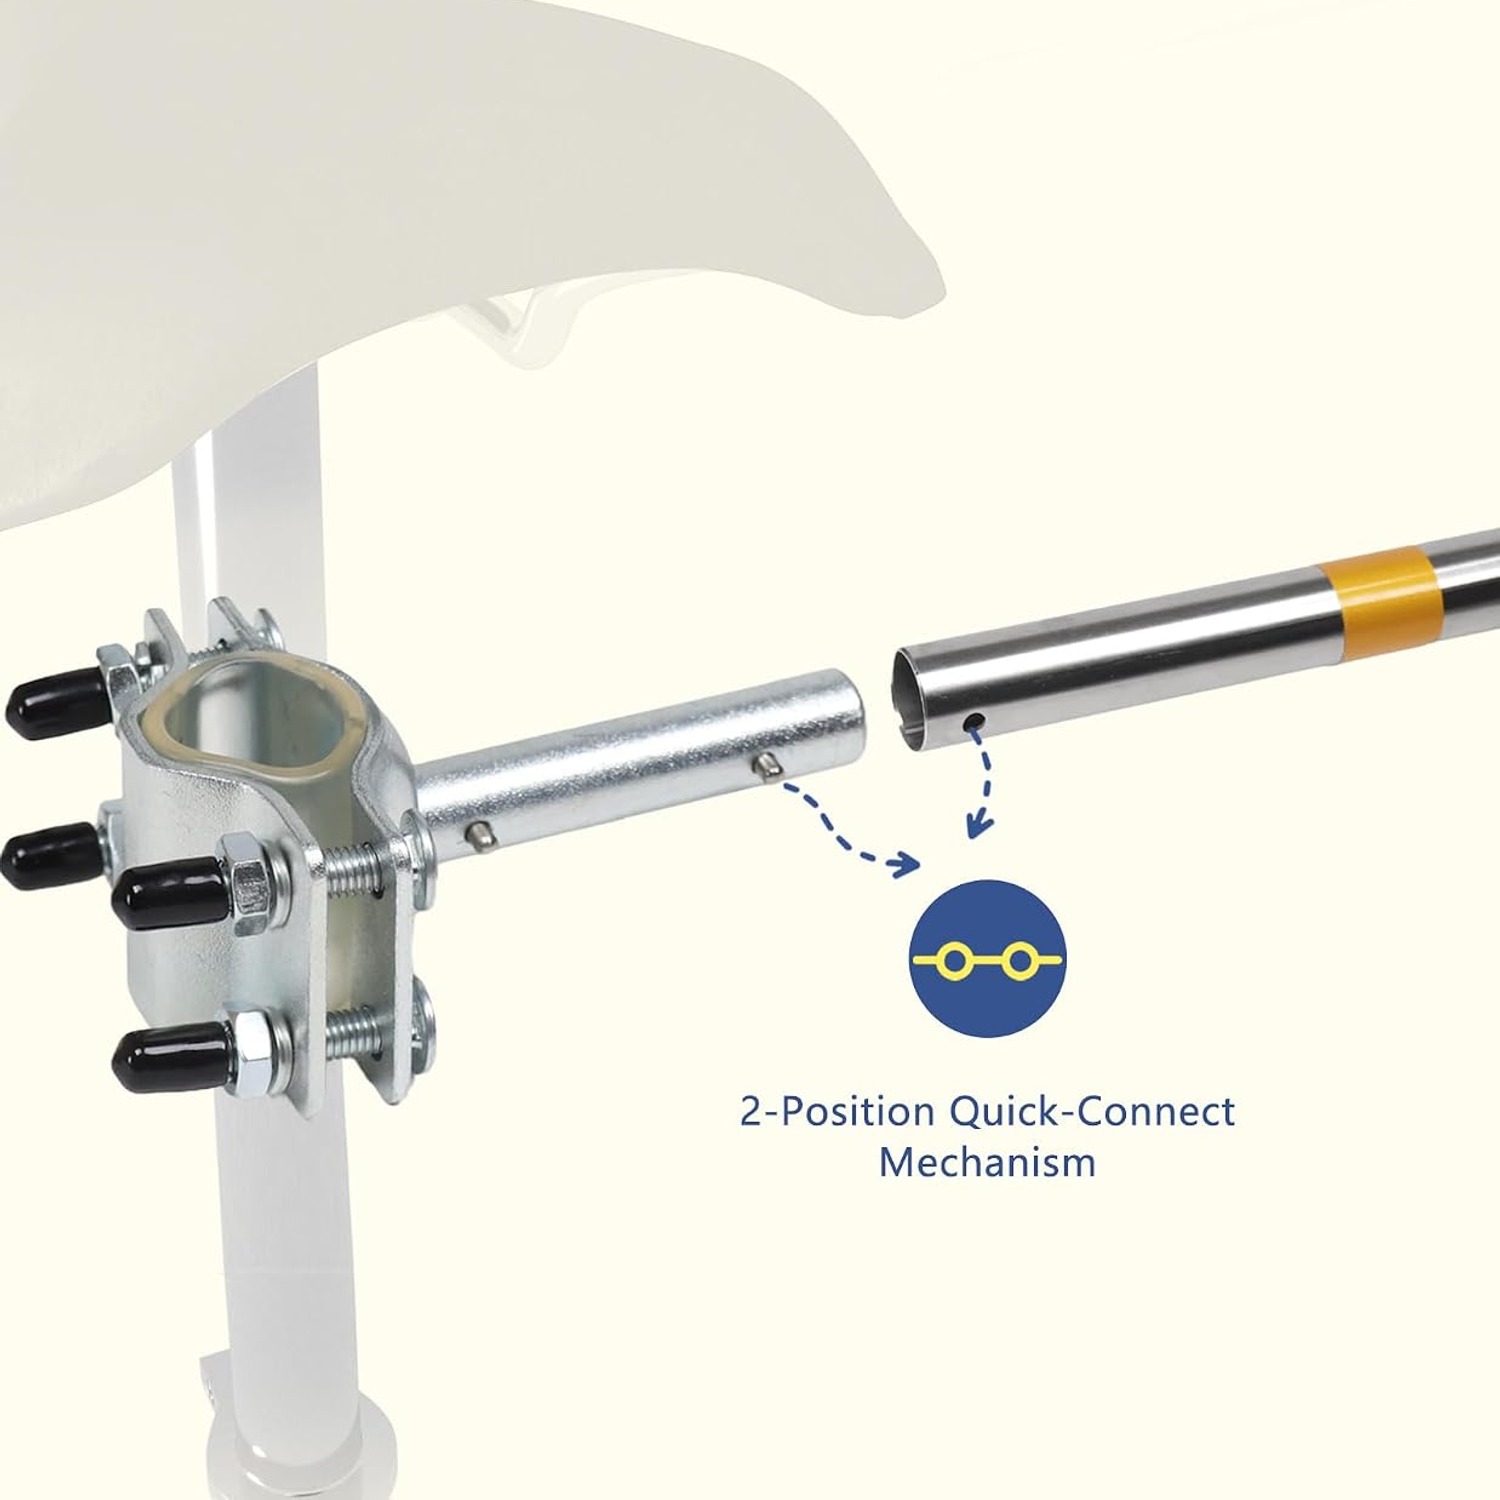
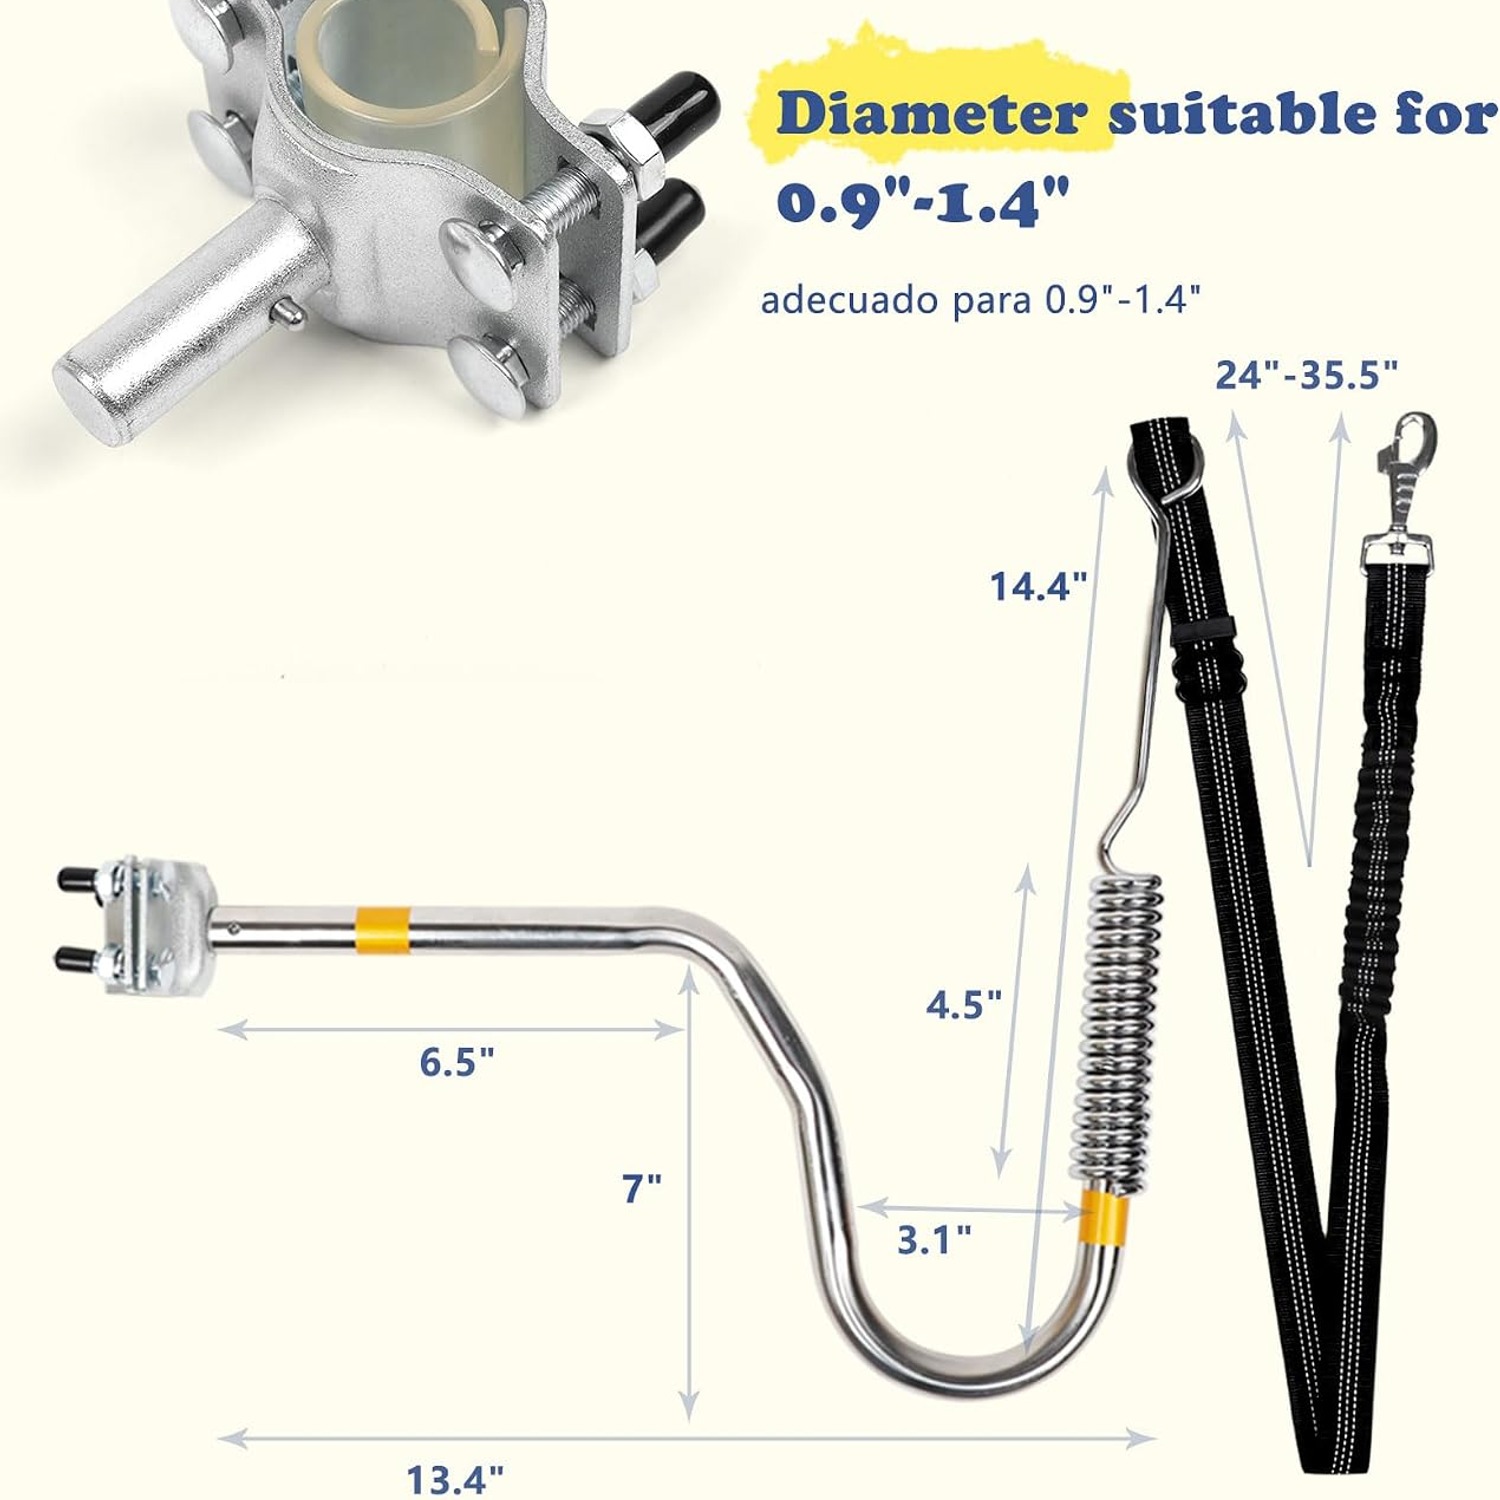
The mount clamps under the seat on the seat post. On this unit it is a stainless steel assembly that you tighten with the included wrench. The seat post is a good anchor because it is strong, it is roughly in the middle of the bike, and almost every bike has one.
From the mount, a rigid arm extends out and up. Height is the detail most people miss when comparing a dog bike leash attachment. A low arm lets the lead droop toward the pedals, chain and rear wheel, which is exactly where you do not want a rope. A high-mounted arm holds the lead above all of that. It also sets a fixed distance between dog and bike, so your dog cannot drift under the wheels when they lose concentration.
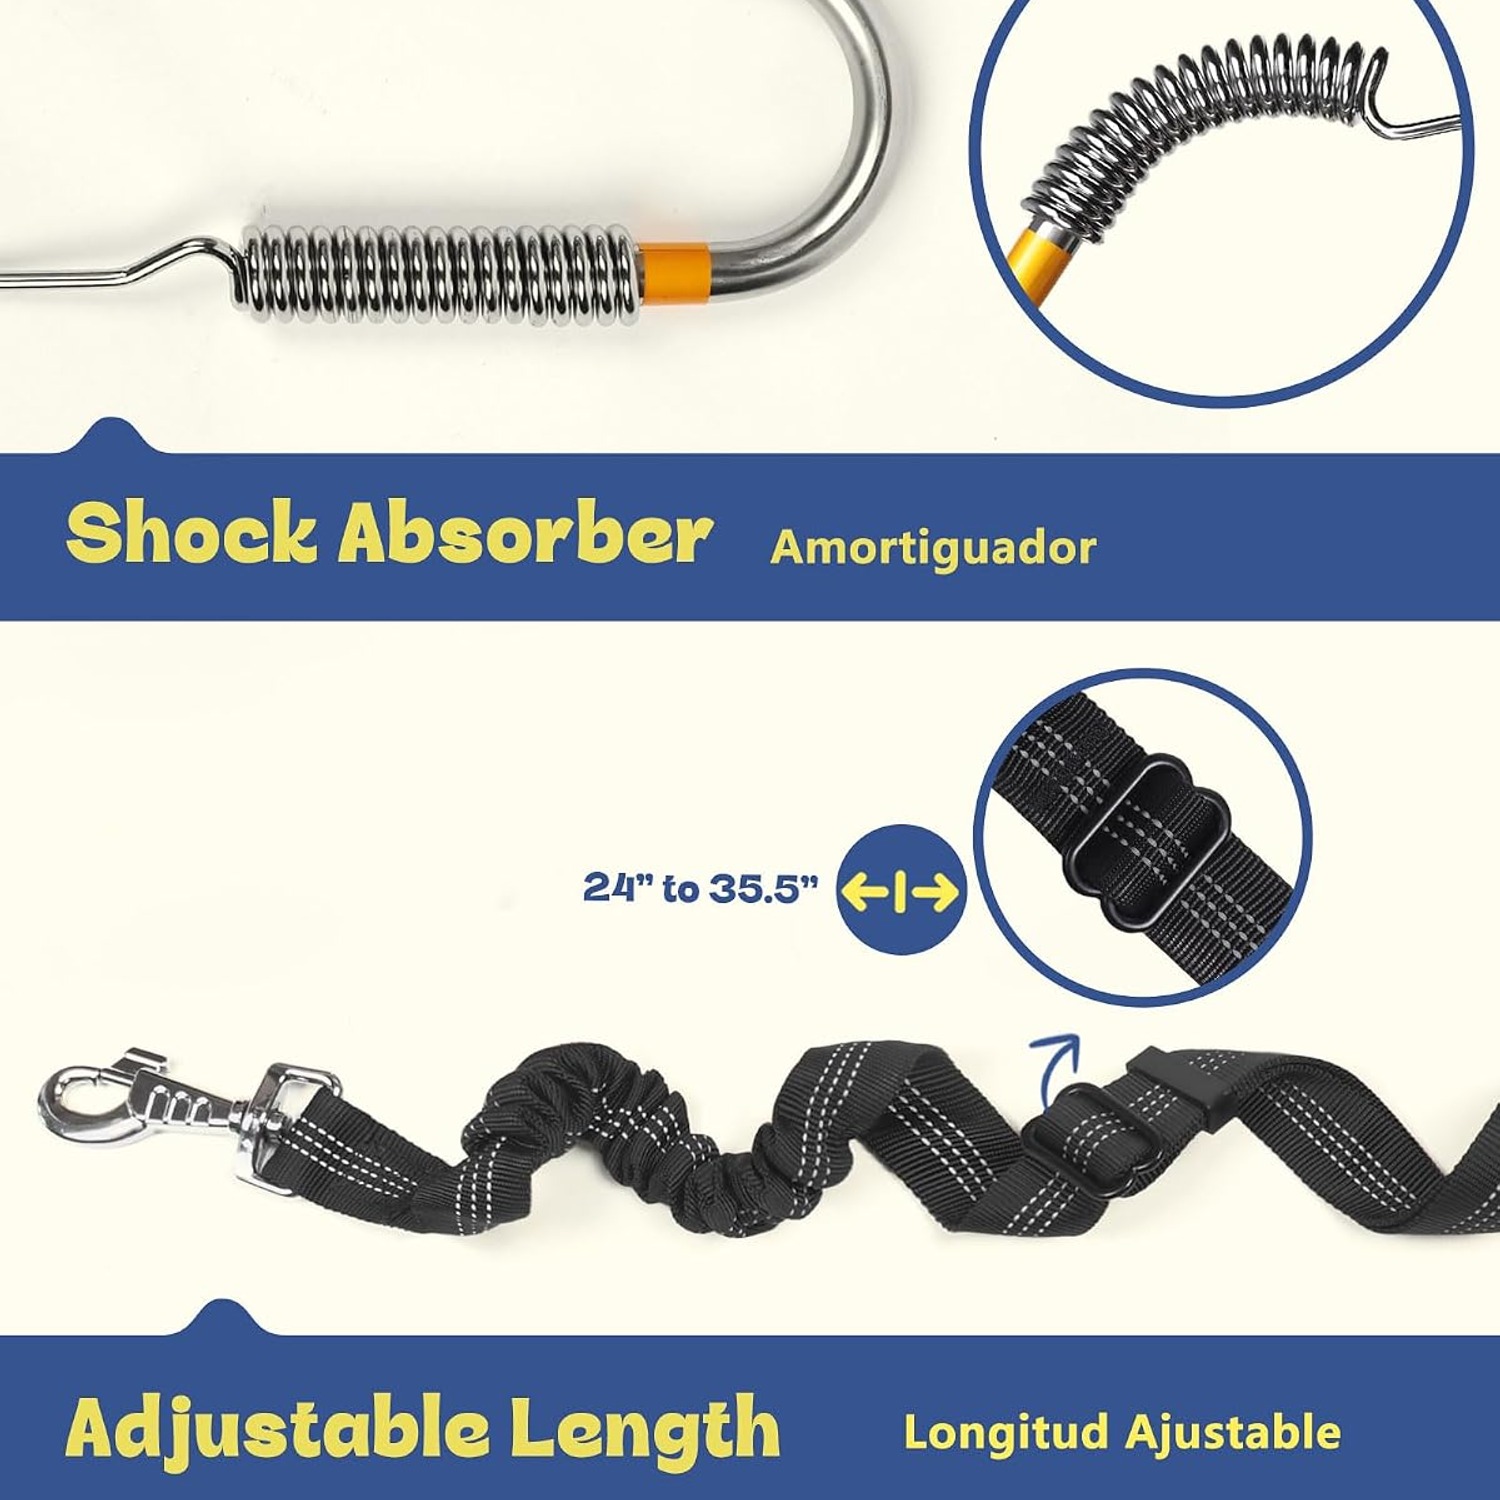
Then there is the lead itself, with a shock-absorbing bungee section between the arm and the clip. This is the part that keeps rides pleasant. Dogs do not pull smoothly. They stop dead at a smell, then surge at a bird. Without a bungee, each of those moments hits the frame as a sharp snap. With one, the stretch spreads the force over a longer instant and what reaches you is a gentle tug.
Who this suits
This setup makes sense for people who already ride regularly and already have a dog that walks well on a lead. It is a way of covering more ground in the same hour, not a way of fixing a dog that pulls.
It is rated for dogs up to 50 kg and is listed for large breeds, so it suits the dogs that genuinely need the mileage. Labradors, shepherds, pointers, collies, the working types that are still bouncing off walls after a forty minute walk. Those dogs are usually the reason someone goes looking for a hands free bicycle dog leash in the first place.
It is less suitable for very small dogs, elderly dogs, flat-faced breeds that overheat easily, and any dog still growing. Sustained running next to a bike is real exercise and it is hard on joints. If your dog is under a year old, or you are not sure, talk to your vet first and keep walking in the meantime.
Choosing the right one
A few things separate a leash you will keep from one that ends up in the shed.
Mount height is the first. Low mounts are cheaper to make and they tangle. Look for an arm that holds the lead clearly above the rear wheel line.
Shock absorption is the second. A plain rigid rod with a rope on the end transmits everything. A bungee section is worth having, and the better ones still have enough tension that the lead does not flop about.
Then weight capacity. Buying a leash rated for small dogs and attaching a 40 kg dog to it is how parts break. This one is built around stainless steel and a high-strength nylon rope, which is the combination you want for a big dog.
Finally, check adjustability and which side it mounts. Being able to run the dog on the kerb side matters, and it changes depending on which country you ride in. Adjustable length lets you run the dog close through town and give a bit more room on a wide path.
Fitting and first rides
Fitting is a seat post job. The mechanism goes under the seat, the spring attaches to the rod, then the lead connects to the spring and to your dog. The wrench and manual are in the box. Take two minutes to get the bolt properly tight and then check it again after your first ride, because new fittings always settle a little.
The first rides are where most of the work happens, and the main mistake is going too far too soon.
Start with the bike standing still. Let your dog sniff the arm and the lead while nothing is moving. Clip them on, give them a treat, unclip. Do that a few times across a couple of days until the hardware is boring.
Next, walk the bike. You on foot, dog clipped on, bike rolling along beside you both. This teaches the dog where they are supposed to be without any speed involved. Five minutes is plenty.
Then ride, slowly, somewhere wide and empty. A park path or an empty car park beats a road. Keep it short. Two or three minutes at a trot is a successful first ride. Build up from there over a few weeks.
Always use a harness rather than a collar. A harness spreads pull across the chest instead of loading the neck, and when you are both moving that difference matters. Clip to the back ring of the harness, not to a thin collar or a head halter.
Riding sensibly
Pace is set by the dog, not by you. An easy trot they can hold is the target, and you should be ready to slow whenever they slow. If your dog's tongue is hanging long and they are falling behind, stop and rest, regardless of how far you have gone.
Watch the ground temperature. Hot tarmac burns paws, and a dog running next to a bike spends a long time on that surface. If the back of your hand cannot sit on the road for five seconds, it is too hot for them. Early morning and evening are kinder in summer.
Carry water. Take a collapsible bowl and stop every fifteen or twenty minutes on warm days. A dog cannot tell you they have had enough until they are already struggling.
Keep the lead short around traffic, pedestrians and other dogs. Longer line is for open stretches with good visibility.
Looking after it
Maintenance is light but worth doing. Rinse the nylon lead with plain water after muddy or salty rides and let it air dry away from radiators. Wipe the stainless steel arm dry so it stays clean.
Before each ride, give the mounting bolt a quick check and run your hand down the lead. You are feeling for frayed rope, cracks in the bungee, or a clip that no longer snaps shut firmly. That check takes seconds and it is the difference between noticing wear and discovering it at speed.
If the bike lives outside, detach the arm and bring it in, or at least cover it.
The short version
A seat post leash takes the pull off your hands and puts it on the bike, which is the one change that makes cycling with a dog workable. The important features are a high mount that keeps the lead clear of the drivetrain, a bungee that softens sudden pulls, and materials strong enough for the dog you actually own. This one uses stainless steel and high-strength nylon, fits most bikes on either side, adjusts for length, and is rated to 50 kg.
Get a good harness, fit the arm properly, and spend a week on short, slow sessions before you attempt anything longer. Do that and you will cover more ground in less time, with a tired, happy dog at the end of it.